2016 was the year I ventured into the woodworking world to experiment with applied Marquetry. It’s December 2016 now and this time last year I was in the middle of a cabinetmaking course at the Southern Alberta Institute of Technology (Calgary, Canada). The course finished in June 2016 with the last project – making a sofa table with a drawer and floating table top. We (the students) didn’t know until the last session started that a sofa table was the project. I decided that I would do some marquetry for the top of the table. This meant that I had three weeks in which to come up with a design and finish the marquetry.
The inspiration for the design came from my wife who had collected some maple leaves from one of our trips to Vancouver Island and we took a photograph to include in our annual book of photograph. She had also recently completed a maple leaf quilt. The design I came up with was a simple string of maple leaves.

Figure 1 Maple Leaf Table Top
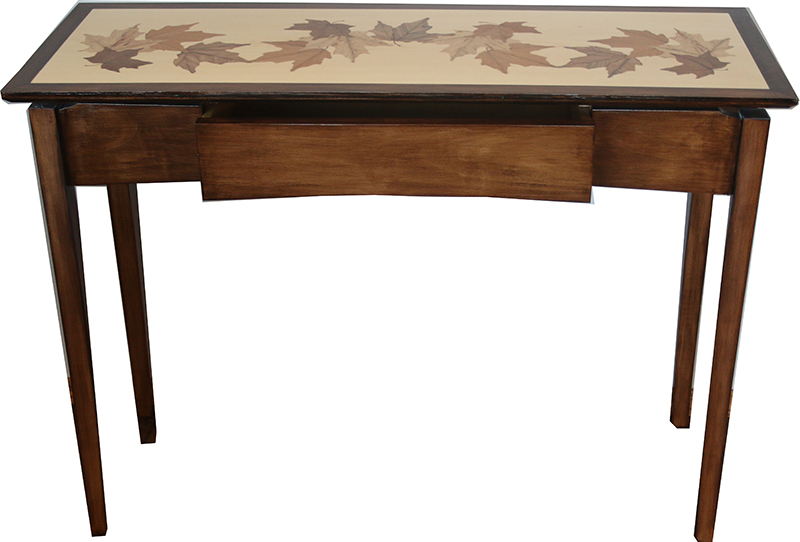
Figure 2 Maple Leaf Sofa Table
In making the piece, I made four sets of three leaves (quarter saw Mahogany, Karelian Masur Birch and Walnut burr) and three single leaves (Red Gum). Then I arranged them on a sheet of flat cut Sycamore and inserted them using the reverse window method. The core for the table top was ¾” MDF and edged with 1 ½” solid wood attached with biscuit joints, mitered at the corners. The underside of the table top was veneered.
This was my first project involving applied Marquetry and after this I felt inspired to do more. An opportunity arose fairly quickly when my wife asked me to make her a quilt rack. She said she would like a motif inlaid into the two sides, but emphasized that it should not distract attention from the quilts, so it should be quite simple. I thought this request was great, as I did not have any experience at the time with inlaying Marquetry. My wife has some Rennie Mackintosh jewelry and likes the rose design.
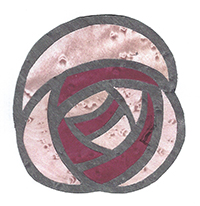
Figure 3 Right Motif
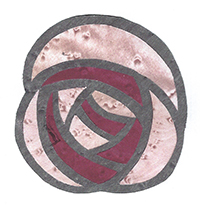
Figure 4 Left Motif
I set about designing the quilt rack by modifying some designs I found on the internet and did the same for a Rennie Mackintosh motif for the two sides. I made two motifs using dyed birds-eye maple in grey, pink and purple.

Figure 5 Routing Inlay Groves
I chose to make the rack out of red oak and cut and milled the parts, ready for assembly.
This was the first time that I had prepared a piece of wood to inlay veneers. I used the internet to research methods for doing inlays. I settled on using a palm router from Bosch (PR20EVSK Colt Palm Grip) with the plunger accessory (PR001 Colt Router Plunge Base). Figure 5 shows the routing of the straight lines using guide rails and ¼” bit. The rose motif fits inside the grid lines, so the routing needs to be done free-hand which is a BIT of a challenge (excuse the pun)! After the routing was complete, I glued the black veneer lines and rose motifs into the two sides.
The parts were then ready for assembly as shown in figure 6.
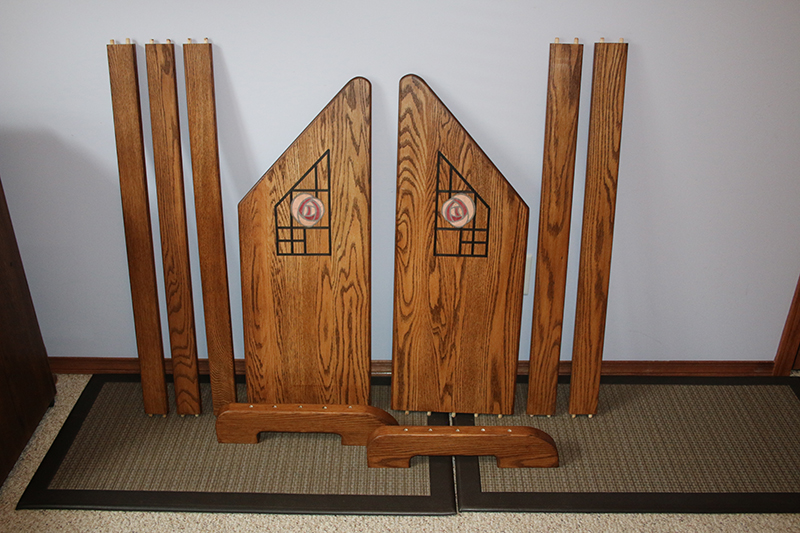
Figure 6 Parts for Quilt Rack

Figure 7 Finished Quit Rack

Figure 8 Rack with Christmas Quilts
I know I made a few mistakes during these two projects but at least it was a start. I have a number of other inlay projects in mind for next year.